Blood Root the Recipe
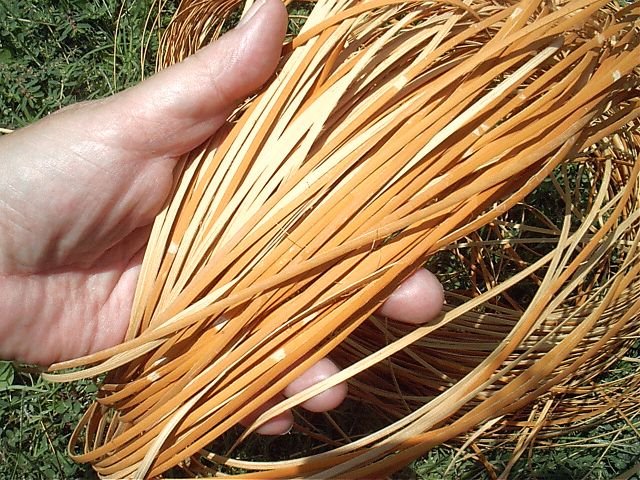
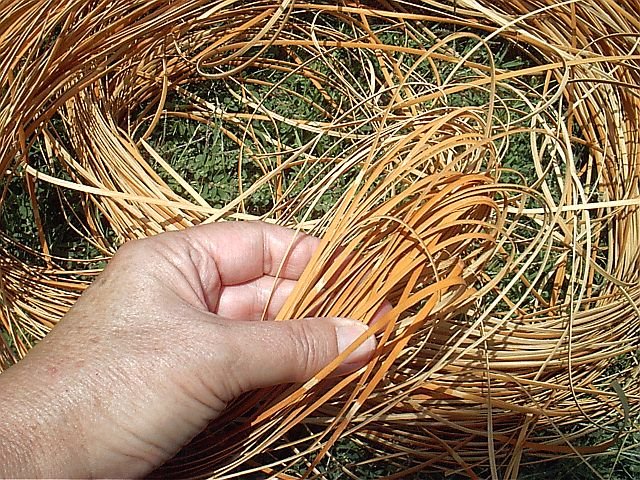
The photos above are of commercial cane dyed with bloodroot. These instructions are from Sandra Pallie a citizen of the Cherokee Nation in Oklahoma and member of the Cherokee Artists Association. This is as she instructed me:
What you need:
- 2 gals. of water
- 1 cup of cut blood root
- 1 cup of plain table salt to set the dye
- 1 coil of commercial cane
- Enamel Stock Pot (commonly called your dye pot)
- Nylon stockings either panty hose or knee highs
Cut the blood root into pieces and place in a nylon stocking, this eliminates the need to strain your dye bath and keeps the natural material from cluttering the dye bath up.
Combine the water, blood root and salt in your dye pot and boil it for about 10 minutes. Then add your cane (or other natural material) continue to boil for a few more minutes. Remove from the heat and set it aside for 1 to 2 hours.
Now check your cane by taking a small piece out of the dye pot to check the color. This is probably the most important part of the process, since it is this checking that will show you the color you have obtained. Remember when wet the cane color will look dark, so if you let the cane dry, you will get a better idea of what the color will be when you remove it. If the color is too light, you can at this point add more bloodroot boil the mixture for another 10 minutes and again let the mixture set for an additional period of time. The length of the time you leave the cane in the dye pot depends on the color you want, darker takes longer than lighter and will require more dye material. Your color will be anywhere from a pale yellow to a dark burnt orange.
Adding alum to the dye bath will turn the blood root to a more red-orange. So it just depends on what color you want and the best way to achieve the desired color is to take the basics and experiment. Alum is considered a mordant and there are likewise other mordants you can experiment with to see if and how it will change the color.
Once you have finished or gotten to the desired color, you can put the remaining dye bath into a container and freeze it for future use. It will last for about a year. Any remaining roots you have you should also be put in the freezer for future use.
Mike Dart, also a citizen of the Cherokee Nation and a member of the Cherokee Artists Association, brings his dye to a boil and then simmers it for about 1/2 hour, so with every basket weaver who uses the natural dyes, the process becomes one of personal preference.
I'm new at this so, I'm still experimenting.
The cane dyed in the photos above, was made with 1 gal of water and one cup of blood root, however, 2 cups of blood root would have given me a darker color and 2 gals of water would have given me a more consistent color since the cane could have circulated in the water better. Since this was my first time trying this, the color came out good but could have been darker. I also simmered my dye bath with the cane for about a 1/2 hour, then set is aside for a short time and simmered it again. I repeated this process for several hours however, Sandra tells me it should not take more than 2 hours to reach the desired dark color. If by that time it has not gotten dark enough, then you would need to add more blood root and repeat the boiling process again.
I did not use the alum mordant since I was looking for a color which would match that used by Eva Wolfe in her baskets. Her bloodroot is darker than mine but it appears she likewise did not use any type of mordant in her dye for at least some of her baskets.
This same dye method will work on any natural material including woods splits, honeysuckle etc and reed used in Cherokee basketweaving as well. You will of course need to vary the recipe depending on the amount of material you are dyeing.

No comments:
Post a Comment